用Google表單製作聯繫表單
原本網站每一頁下方有放留言版,但後來發現使用率不高,所以決定做一個簡單的聯繫表單,本篇文章參考完全客製 Google 表單,美化表單樣式製作。
Google表單
製作Google表單
首先在google雲端硬碟新增Google表單,把問題和欄位填一填後,應該會長得像這個樣子。
取得必要欄位
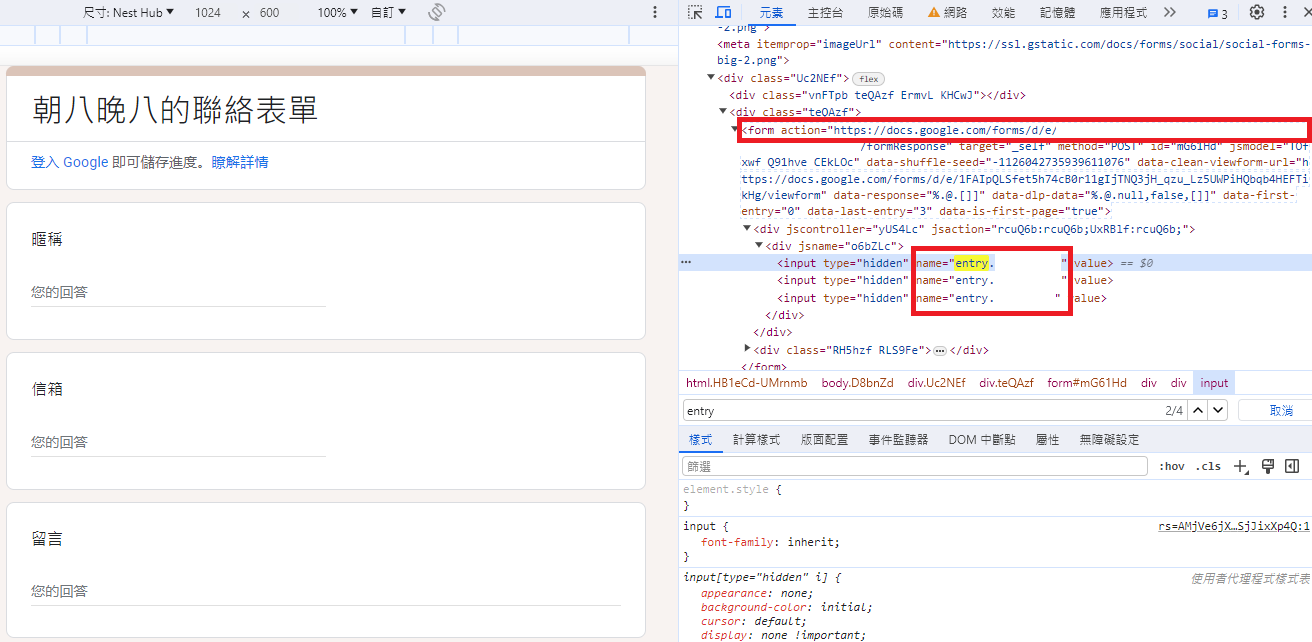
點右鍵選擇「檢查」,windows可以直接按「F12」,按下crtl+F搜尋<form會看到<form action="https://...",把https://docs.google.com/forms/d/e/.../formResponse複製起來。
搜尋entry會看到<input type="hidden" name="entry.XXXX",把entry.XXXX複製起來,分別依序對應表單設計的問題,以我的Google表單有3個entry.XXXX,就是分別對應暱稱、信箱、留言。
客製表單
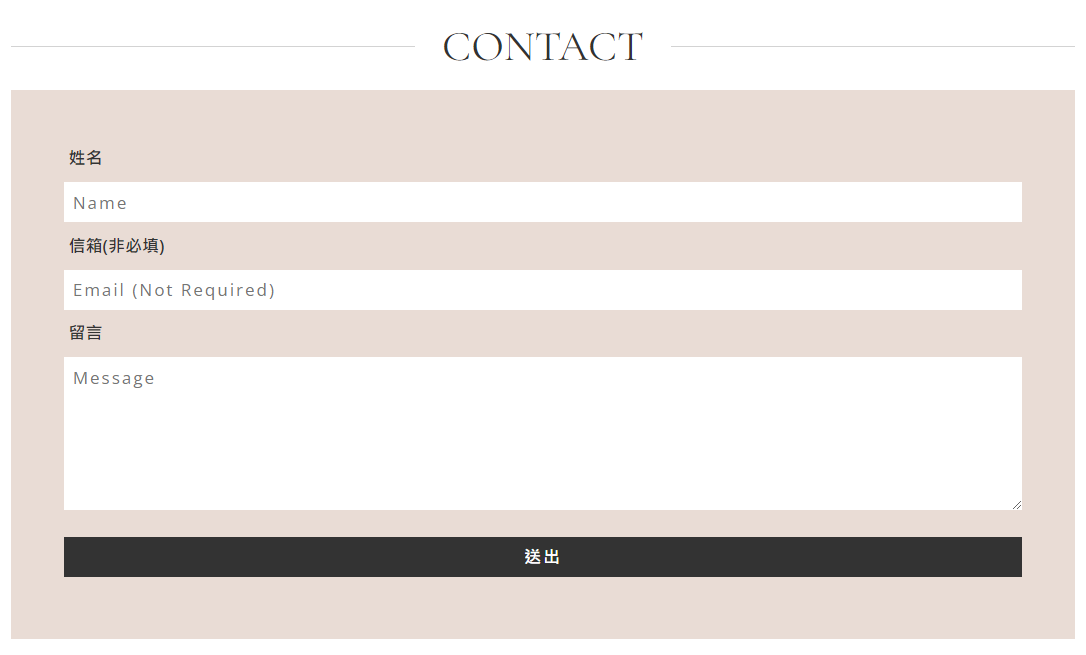
做一個純色的簡單樣式。
- index.js
- style.module.css
src/components/Contact/index.js
import React from 'react';
import styles from "./styles.module.css";

export default function HomepageContact() {
  return (
    <section>
      <div className="container">
        <h2 className={styles.ContactTitle}>CONTACT</h2>
        <div className={styles.ContactForm}>
          <form className="form" target="_blank" rel="noreferrer noopenner" action="https://docs.google.com/forms/.../formResponse" method="POST" role="form">
            <div className="form-group">
              <label for="name">姓名</label>
              <input type="text" className="form-control" name="entry.XXXX" placeholder="Name" required></input>
            </div>
            <div className="form-group">
              <label for="email">信箱(非必填)</label>
              <input type="email" className="form-control" name="entry.XXXX" placeholder="Email (Not Required)" ></input>
            </div>
            <div className="form-group">
              <label for="message">留言</label>
              <textarea name="entry.XXXX" placeholder="Message" required></textarea>
            </div>
              <input type="submit" value="送出" />
          </form>
        </div>
      </div>
    </section>
  );
}
src/components/Contact/style.module.css
.ContactTitle{
  font-family: 'Cormorant Garamond', serif;
  font-size: 2.5rem;
  font-weight: 400;
  text-align: center;
  position: relative;
  display: block;
  top: calc(var(--ifm-navbar-height) + 1rem);
  margin-bottom: calc(var(--ifm-navbar-height) + 2rem);
}
.ContactTitle::before,.ContactTitle::after{
  content: "";
  position: absolute;
  top: 50%;
  background: #D3D3D3;
  height: 1px;
}
.ContactTitle::before{left: 0%;}
.ContactTitle::after{right: 0%;}
.ContactForm{
  padding: 5%;
  margin-bottom: 5rem;
  background: var(--ifm-color-primary-lighter);
}
.ContactForm textarea,.ContactForm input,.ContactForm input[type="submit"]{
  width: 100%;
  padding: 0.5rem;
  margin: 0.5rem 0;
  font-family: 'Open Sans';
  font-size: 1rem;
  letter-spacing: 2px;
  border: none;
  -webkit-appearance : none;
}
.ContactForm label{font-weight: bold;}
.ContactForm textarea{
  resize:vertical;
  height: 9rem;
}
.ContactForm input[type="submit"]{
  background: var(--ifm-font-color-base);
  color: white;
  font-weight: bold;
}
.ContactForm input[type="submit"]:hover{background: var(--ifm-color-primary);}
@media screen and (max-width:445px){
.ContactTitle::before,.ContactTitle::after{width: 18%;}
}
@media screen and (max-width:700px){
.ContactTitle{
  font-size: 2rem;
  padding: 0 5%;
}
.ContactForm{margin: 0 5% 5rem 5%;}
}
@media (min-width:446px){.
ContactTitle::before,.ContactTitle::after{width: 28%;}
}
@media (min-width:997px){
.ContactTitle::before,.ContactTitle::after{width: 38%;}
}